How To Add Storylines To Your Wooden Jigsaw Puzzle: A Creative Guide
Imagine a wooden jigsaw puzzle where each piece is more than a part of an image; it’s a chapter in a captivating story waiting to

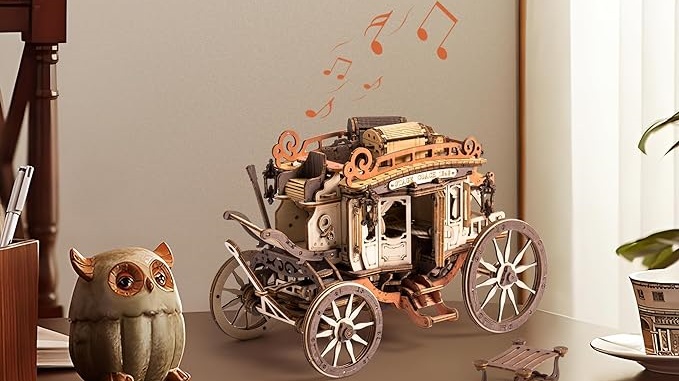
The allure of a 3D wooden puzzle extends beyond mere assembly; it’s an invitation to creativity and personalization.
In this guide, we delve into the art of carving, transforming simple wooden pieces into intricate works of art.
With detailed steps, tool recommendations, and technique mastery, we’ll ensure your puzzle tells a unique story, elevating it from a mere object to a masterpiece that captures the imagination.
Before the chips fly and sawdust fills the air, let’s ground ourselves in the basics of 3D wooden puzzle carving. This stage is all about preparation, choosing the right materials, and gearing up with the proper tools.
A solid foundation is essential for any artist, and here, we lay the groundwork for your carving journey.
Choosing the right puzzle is paramount. Look for puzzles made from softer woods, such as basswood or pine, which are easier to carve while still maintaining the integrity of the piece.
The thickness of the puzzle pieces should also be considered; thicker pieces offer more depth for detailed carving without risking breakage.
This choice is the first step in transforming a plain 3D wooden puzzle into a personalized work of art. It’s about finding a balance between ease of carving and durability of the final piece.
For carving, the right tools make all the difference. Begin with a basic set of carving tools, including a variety of chisels, gouges for creating curves, and a reliable carving knife for detailed work.
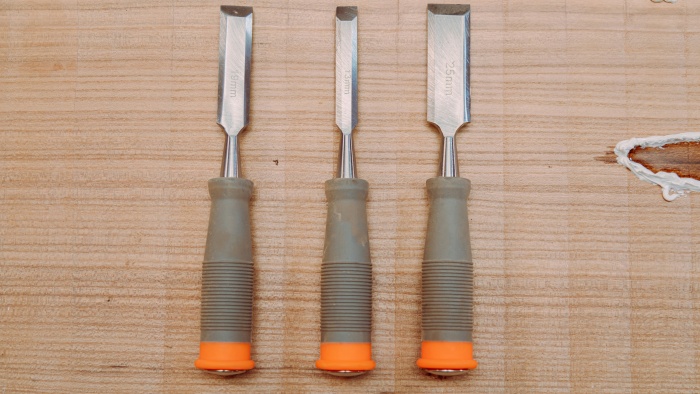
Quality matters, as sharp, well-made tools not only make carving more enjoyable but also safer.
Over time, you’ll learn which tools best suit the specific details and textures you wish to create, making each 3D wooden puzzle uniquely yours.
Carving should be enjoyable, not a trip to the emergency room.
Always wear carving gloves to protect your hands from slips and goggles to shield your eyes from flying wood chips.
Work in a well-lit area where you can easily see your work, and keep your tools sharp.
Dull tools require more force to cut, increasing the risk of accidents. Emphasizing safety ensures that your focus remains solely on the creativity and craftsmanship of your carving.
With the basics covered, it’s time to dive into the heart of carving.
This section is where your 3D wooden puzzle begins to take on a life of its own, through the careful application of various carving techniques.
From basic strokes to intricate detailing, mastering these skills will transform your puzzle into a work of art.
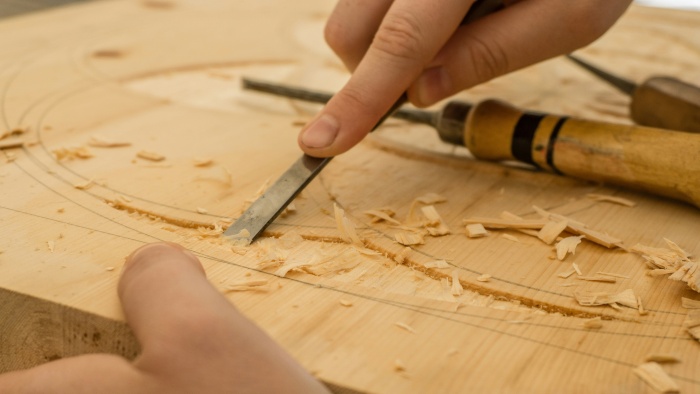
Master the fundamentals: push stroke, pull stroke, and the stop cut. The push stroke, executed by gently pushing the tool away from you, is ideal for making thin, controlled cuts.
The pull stroke, where you draw the tool towards yourself, offers unparalleled precision for intricate designs.
The stop cut is your boundary marker, ensuring that your carving does not extend beyond intended areas. These strokes are the ABCs of carving, enabling you to add dimension and detail to your 3D wooden puzzle.
Shading and texturing are where your carving starts to come alive. These techniques allow you to mimic the intricacies of natural forms, adding realism and depth to your work.
Use a V-gouge to create fine lines for shading, and experiment with different gouges to achieve various textures.
This step is akin to painting with wood, where each stroke contributes to the overall effect, making your 3D wooden puzzle a rich tapestry of visual and tactile experiences.
Detailing is where your patience and precision shine. It’s about adding those final touches that make your 3D wooden puzzle stand out.
Whether it’s engraving a delicate pattern or sculpting a tiny feature, the right detailing tools—a, a set of micro chisels or a fine carving knife—are essential.
This meticulous work transforms a simple piece of wood into a detailed masterpiece, imbuing your 3D wooden puzzle with character and life.
The journey from a blank 3D wooden puzzle to a personalized masterpiece concludes with the finishing touches.
These final steps are crucial for protecting your work and enhancing its beauty. From sanding to selecting the right finish, each decision you make adds to the story of your creation.
The act of sanding transforms your carved 3D wooden puzzle from a rough sculpture into a smooth, tactile object of beauty.
Begin with coarse grit to remove any large imperfections and gradually move to a finer grit for a polished finish.
This process not only prepares the surface for finishing but also reveals the subtle details and textures of your carving, ensuring that your artistry is fully appreciated.
Selecting and applying the right finish is crucial for protecting and enhancing the appearance of your 3D wooden puzzle.
Whether you prefer the natural look of linseed oil, the protective qualities of polyurethane, or the rustic charm of beeswax, the choice of finish can dramatically affect the puzzle’s final look and feel.
Apply your chosen finish with care, ensuring even coverage to bring out the beauty of the wood grain and your carving work.
Assembling your carved 3D wooden puzzle is the final step in your creative journey. This process, while delicate, is immensely satisfying.
You may find that some pieces fit differently after carving and finishing. Approach this with patience, gently adjusting each piece as needed.
The assembly not only showcases the puzzle in its entirety but also highlights the precision and care taken in every step of the carving process.
Enhancing a 3D wooden puzzle with carving transforms it from a simple object into a personalized work of art, a testament to creativity and craftsmanship.
From selecting the right puzzle and tools to mastering carving techniques and applying finishing touches, each step of the process adds depth and character to the final piece.
Whether displayed in your home or given as a gift, a carved 3D wooden puzzle is a unique and meaningful creation that stands out for its beauty and ingenuity. Embrace the challenge and let your artistic journey begin!
Can I use power tools for carving my 3D wooden puzzle?
Yes, power tools can be used for carving 3D wooden puzzles, especially for removing large areas of wood or rough shaping. However, for finer details and precision work, manual carving tools are recommended. Power tools require a different skill set and safety precautions, so ensure you’re comfortable and experienced before using them on your puzzle.
How do I choose a theme for carving my 3D wooden puzzle?
Choosing a theme depends on your interests and the final look you desire for your puzzle. Consider themes that resonate with your personal style or the intended recipient’s tastes. Nature, geometric patterns, or specific motifs like floral or animal designs are popular choices. The complexity of the theme should match your carving skill level to ensure a satisfying result.
What’s the best way to practice carving before starting on my puzzle?
Practicing on scrap pieces of wood similar to your puzzle’s material is the best approach. Start with basic shapes and textures to familiarize yourself with the carving tools and techniques. As you gain confidence, try more intricate designs that mimic the details you plan to incorporate into your puzzle. This practice helps refine your skills without risking damage to your actual puzzle pieces.
How long does it take to carve a 3D wooden puzzle?
The time it takes to carve a 3D wooden puzzle varies greatly depending on the complexity of the design, the size of the puzzle, and your skill level. Simple designs might only take a few hours, while intricate patterns can require several days of work. Patience is key; rushing can lead to mistakes that compromise the puzzle’s integrity.
Can I color my carved 3D wooden puzzle, and if so, how?
Yes, you can color your carved 3D wooden puzzle to highlight the details and add another layer of aesthetic appeal. Use wood stains for a natural look or acrylic paints for vibrant colors. Always apply a test patch on a scrap piece of wood to ensure the color matches your vision. After coloring, apply a clear sealant to protect both the wood and the paint or stain.