How To Add Storylines To Your Wooden Jigsaw Puzzle: A Creative Guide
Imagine a wooden jigsaw puzzle where each piece is more than a part of an image; it’s a chapter in a captivating story waiting to

Ever thought about creating your own 3D wooden puzzle? The idea might seem daunting at first, but with the right tools and a bit of patience, you can craft something truly unique.
This guide will take you through the steps of making a 3D wooden puzzle that not only challenges the mind but also serves as a beautiful piece of art, providing both aesthetic pleasure and a sense of achievement upon completion.
Before diving into the sawdust and wood chips, it’s crucial to have a solid plan. Designing your 3D wooden puzzle involves a blend of creativity and precision, ensuring that the final product is not only functional but also visually appealing.
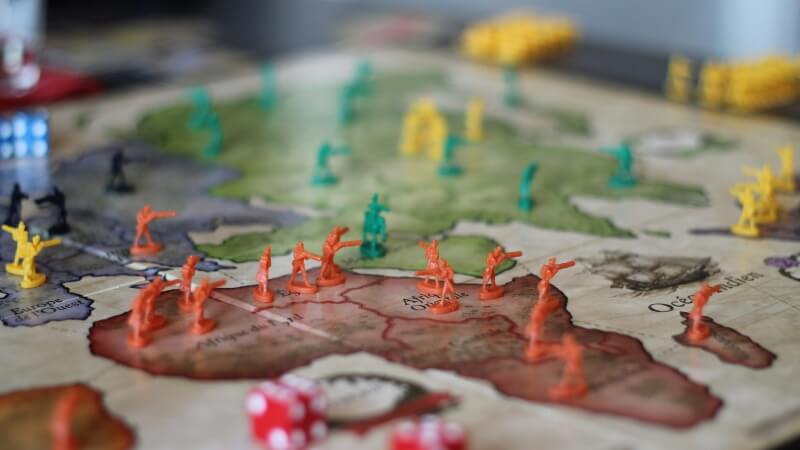
Every great creation begins with inspiration. Look at existing 3D wooden puzzles for ideas. The internet is awash with images and forums dedicated to woodworking and puzzles, offering a treasure trove of designs that can spark your creativity.
Pay attention to the themes that resonate with you, be it the natural world, architectural marvels, or abstract concepts.

Sketching out initial ideas on paper can be a helpful way to visualize your thoughts and refine them into a coherent design.
This stage is all about letting your imagination run wild while also considering the practical aspects of puzzle construction.
To bring your vision to life, choosing the right design software is essential. SketchUp, AutoCAD, and Fusion 360 are popular choices among hobbyists and professionals alike.
These programs offer a range of tools for modeling your puzzle in 3D, allowing you to experiment with different shapes and fits. If you’re new to 3D modeling, many online tutorials and communities can help you get started.
The key is to find software that strikes the right balance between power and usability, enabling you to iterate on your design without getting bogged down in technical details.
The refinement phase is where your initial concept starts to take on a more concrete form. Consider the size of the puzzle, the number and shape of the pieces, and how they will fit together.
It’s important to strike a balance between making the puzzle challenging enough to be engaging, without it being so difficult that it becomes frustrating.
Use your design software to experiment with different configurations and ensure that all pieces can be cut and assembled feasibly.
This is also the time to think about any decorative elements or finishes you might want to add to the puzzle, which can enhance its appearance and make it truly unique.
Selecting the right materials and tools is crucial for turning your design into reality. The choices you make here will affect not only the construction process but also the look, feel, and durability of your finished puzzle.
Wood selection will significantly impact the final appearance and quality of your 3D wooden puzzle.
Hardwoods like maple and cherry are known for their durability and fine grain, making them ideal for puzzles that require a smooth finish and intricate details.
Softwoods like pine can be easier to cut and are more affordable, but they might not hold up as well over time or with intricate cuts.
Consider the properties of different woods, such as grain pattern, hardness, and color, to find the best fit for your project. It’s also worth thinking about sustainability and choosing wood from responsibly managed forests.
The tools you’ll need depend on the complexity of your puzzle and your preferred method of working.
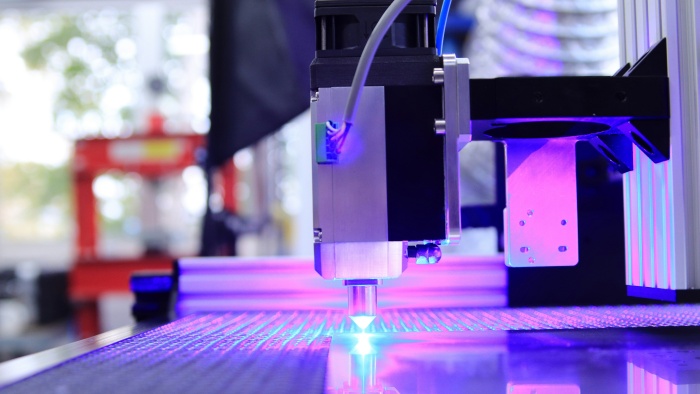
Basic tools like saws, chisels, and files are essential for cutting and shaping wood. For more intricate designs, a laser cutter can provide precision cuts that are difficult to achieve by hand.
Sandpaper of various grits will be needed for smoothing and finishing the wood surfaces.
Don’t forget about safety equipment, such as goggles and dust masks, to protect yourself during the cutting and sanding processes.
Deciding between laser cutting and hand cutting depends on your access to equipment, the complexity of your design, and your personal preferences.
Laser cutting offers unparalleled precision and speed, making it ideal for complex or highly detailed puzzles. However, it requires access to a laser cutter, which can be expensive or require a membership to a makerspace.
Hand cutting, while more time-consuming and requiring a steadier hand, can be immensely satisfying and allows for greater flexibility in adjusting your design as you go. Both methods have their merits, and the choice ultimately comes down to what best suits your project and working style.
With all the pieces cut and ready, you’re now at the exciting stage of assembling your puzzle. This phase is where your project truly comes to life, as you see how well your design and craftsmanship come together.
Before final assembly, it’s important to test fit all the pieces of your puzzle. This step allows you to identify any pieces that might need adjustment, ensuring a perfect fit.
It’s not uncommon to find that some pieces are too tight or too loose, requiring minor tweaks to achieve the desired fit.
This process can be both challenging and rewarding, as it requires a keen eye for detail and a steady hand to make precise adjustments.
Test fitting is a critical step in ensuring that your puzzle will come together smoothly and be enjoyable to solve.
Once all the pieces fit together correctly, the next step is to sand and polish each piece to a smooth finish. Start with coarser grit sandpaper to remove any rough edges or imperfections, and gradually move to finer grits for a smooth, polished feel.
This not only improves the appearance of your puzzle but also makes it more pleasant to handle.
Sanding is a meditative process that requires patience but is ultimately rewarding, as it brings out the natural beauty of the wood and prepares it for any finishing touches.
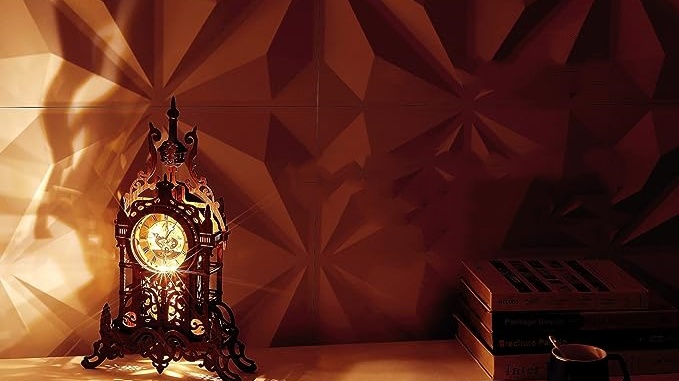
Adding color and protection to your puzzle can enhance its visual appeal and longevity. Painting allows you to add intricate details or thematic elements to your puzzle, bringing it to life.
Choose paints that are suitable for wood and consider using a primer to ensure even coverage.
Sealing the wood with a clear varnish or oil can protect it from wear and tear, preserving your puzzle for years to come.
This final step is where your puzzle truly becomes a work of art, reflecting your personal style and the care you’ve put into its creation.
Creating a 3D wooden puzzle is a deeply rewarding experience that blends creativity, precision, and craftsmanship. From the initial design phase to the final finishing touches, each step offers its own challenges and joys.
Whether you’re a seasoned woodworker or a newcomer to the world of DIY projects, making a 3D wooden puzzle provides a unique opportunity to test your skills and create something beautiful and engaging.
So, gather your materials, let your creativity flow, and embark on the rewarding journey of crafting your own 3D wooden puzzle.
What is the best way to start if I’m new to woodworking and want to make a 3D wooden puzzle?
If you’re new to woodworking, start with a simple design and familiarize yourself with basic tools and techniques. Consider taking a beginner’s course in woodworking or 3D modeling to understand the fundamentals. Start with softwood, as it’s easier to cut and work with, and practice making basic shapes before moving on to more complex designs.
Can I make a 3D wooden puzzle without a laser cutter?
Yes, you can make a 3D wooden puzzle without a laser cutter by using hand tools like saws, chisels, and files. While a laser cutter offers precision and speed, hand tools allow for a more hands-on approach, which can be very satisfying. It may take longer and require more skill to achieve the same level of detail, but it’s entirely possible and rewarding.
How do I ensure that the pieces of my 3D wooden puzzle fit together perfectly?
To ensure that the pieces fit together perfectly, start by designing your puzzle with precise measurements in your 3D modeling software. When cutting the pieces, be meticulous and make adjustments as needed. After cutting, test fit the pieces and sand or trim them for a snug fit. Remember, the key to a perfect fit lies in precise cutting and patient fitting.
What kind of finish should I apply to my 3D wooden puzzle to protect it?
The finish you choose depends on the desired look and the type of wood used. For a natural look, a clear coat of polyurethane or shellac can protect the wood while highlighting its beauty. If you prefer a colored finish, consider using wood stains followed by a protective sealant. Always test the finish on a scrap piece of wood to ensure compatibility and satisfaction with the result.
Are there any resources available for beginners to learn 3D puzzle design and woodworking?
Yes, there are many resources available for beginners, including online tutorials, YouTube channels, and community workshops. Websites like Instructables and forums dedicated to woodworking and puzzle-making can offer valuable tips and guidance. Additionally, many public libraries and community centers offer access to tools and classes on woodworking and 3D design software.